TITLE: TREZOR.IO/START – COMPLETE SETUP GUIDE FOR BEGINNERS
INTRODUCTION
Trezor hardware wallets are widely trusted for securing cryptocurrency. Whether you have a Trezor Model One or a Trezor Model T, the official place to begin the setup is Trezor.io/start. This page guides new users through downloading Trezor Suite, initializing their device, safeguarding their recovery seed, and preparing their wallet for safe crypto management. The following 800-word guide explains the entire process in plain language to help you get started quickly and securely.
SECTION 1: WHY VISIT TREZOR.IO/START
Trezor.io/start is the official onboarding portal for all Trezor devices. It provides verified setup instructions, software downloads, firmware guidance, and important security rules. Because cryptocurrency wallets deal with sensitive information, always use Trezor.io/start instead of third-party websites. This ensures you download the correct software free of malware or harmful modifications.
At the start page, you can:
– Download Trezor Suite
– Choose your device model
– Learn about security best practices
– Follow interactive setup instructions
– Check for firmware updates
IMPORTANT: Trezor will never ask for your recovery seed. Only use Trezor.io/start for installation to maintain the highest level of security.
SECTION 2: DOWNLOADING TREZOR SUITE
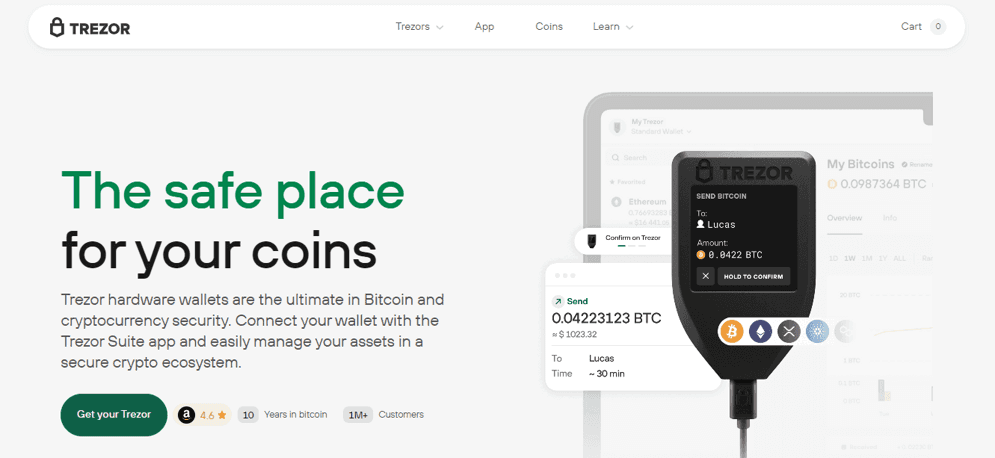
Trezor Suite is the official desktop and browser-based application used to manage your Trezor wallet. It allows you to store, send, receive, and track crypto while using the security of your hardware device.
Follow these steps:
Go to Trezor.io/start.
Select your device model (Model One or Model T).
Click “Download Trezor Suite.”
Choose your operating system for Windows, macOS, or Linux.
Install and open the application.
After launching Trezor Suite, you will be prompted to connect your hardware wallet and begin the initial setup process.
SECTION 3: CONNECTING YOUR TREZOR DEVICE
Use the USB cable included with your device to connect your Trezor to your computer. Trezor Suite will automatically detect it and begin guiding you through the setup.
If this is your first time using the wallet, Trezor Suite may suggest a firmware update. Updating firmware ensures your device has the latest security protections.
SECTION 4: CREATING A NEW WALLET
Once your Trezor is connected, select “Create new wallet” inside Trezor Suite. This will begin the process of generating your recovery seed.
The recovery seed is the most important piece of information for any Trezor user. It is a sequence of 12, 18, or 24 words that functions as the master key to your cryptocurrency wallet.
SECTION 5: WRITING DOWN YOUR RECOVERY SEED
Your Trezor device will display your recovery seed word by word. You must write these words down carefully and in the exact order shown.
IMPORTANT RULES FOR YOUR RECOVERY SEED:
– Write it down on paper only.
– Never store it in emails, screenshots, or cloud storage.
– Never share it with anyone.
– Never enter it into websites or online forms.
– Keep it stored in a secure physical location.
CRITICAL WARNING: Anyone with your recovery seed can permanently access your crypto. Trezor support will never ask for your seed, and no legitimate software will ask you to type it into a computer.
SECTION 6: CONFIRMING THE RECOVERY SEED
After writing your seed words, your Trezor will ask you to confirm them. This step ensures you copied them properly. Once the confirmation is finished, your wallet is officially created.
SECTION 7: SETTING A PIN CODE
Your Trezor will now guide you to create a PIN. The PIN protects your physical device from unauthorized access.
PIN guidelines:
– Use a unique PIN not used anywhere else
– Choose a combination difficult to guess
– Avoid predictable patterns
If someone repeatedly enters the wrong PIN, the device will reset, protecting your wallet.
SECTION 8: USING TREZOR SUITE TO MANAGE CRYPTO
With your wallet initialized, you can now use Trezor Suite to manage your cryptocurrency. Trezor Suite enables safe interaction with your hardware device, ensuring your private keys never leave your Trezor.
Through Trezor Suite, you can:
– Add accounts for Bitcoin, Ethereum, and many other coins
– View balances and transaction history
– Send and receive crypto
– Buy, sell, and trade supported assets
– Enable advanced features such as Tor or coin control
SECTION 9: RECEIVING CRYPTO
To receive cryptocurrency:
Open Trezor Suite.
Select the account you wish to receive into.
Click “Receive.”
Verify the receiving address both on your computer and on your Trezor screen.
Share the verified address with the sender.
Verifying the address on the hardware screen prevents phishing and malware-based address manipulation.
SECTION 10: SENDING CRYPTO
To send crypto safely:
Go to the “Send” section in Trezor Suite.
Enter the recipient’s address.
Enter the amount to send.
Confirm the transaction on your computer.
Physically approve the transaction on your Trezor device.
No transaction can occur unless you approve it on the physical device, ensuring strong protection.
SECTION 11: ONGOING SECURITY PRACTICES
To keep your Trezor wallet secure, follow these essential rules:
– Never reveal your recovery seed
– Keep software and firmware updated
– Use a strong PIN
– Buy devices only from official retailers
– Store your recovery seed offline in a secure location
Your hardware wallet remains extremely secure as long as you protect your recovery seed.
SECTION 12: FINAL THOUGHTS
Trezor.io/start is the safest and most reliable way to begin using your Trezor wallet. By following the instructions on the site and understanding the importance of PIN security and recovery seed protection, you can confidently manage your cryptocurrency with one of the strongest hardware wallets available. Safe setup ensures long-term protection for your digital assets.